How to keep your custom ringtones when you switch to a new iPhone
Published October 1, 2026 · 6 min read
Ringtones bought from the iTunes Store come back on a new iPhone (Settings › Sounds & Haptics › Ringtone › Download All Purchased Tones). Tones you made yourself are less reliable: keep the audio files in iCloud Drive and re-add them on the new phone, which takes a minute per tone.
Below is a simple routine for before and after the switch, plus how to put each person’s ringtone back in Contacts.
What comes over to a new iPhone, and what may not?
- Purchased tones: Apple lists purchased ringtones among the things an iCloud backup includes, and you can download them again with the same Apple Account.
- Tones you made (GarageBand, “Use as Ringtone”, Finder): they often come across with a full backup or a direct transfer, but people regularly report missing ones. Don’t rely on it.
- Contact ringtone assignments: if a contact’s tone didn’t come across, that contact quietly uses your default ringtone.
- The source files: anything in iCloud Drive, and your GarageBand projects if you keep them in iCloud Drive, are there on every device signed in to the same account.
Before you switch: save your tones somewhere safe
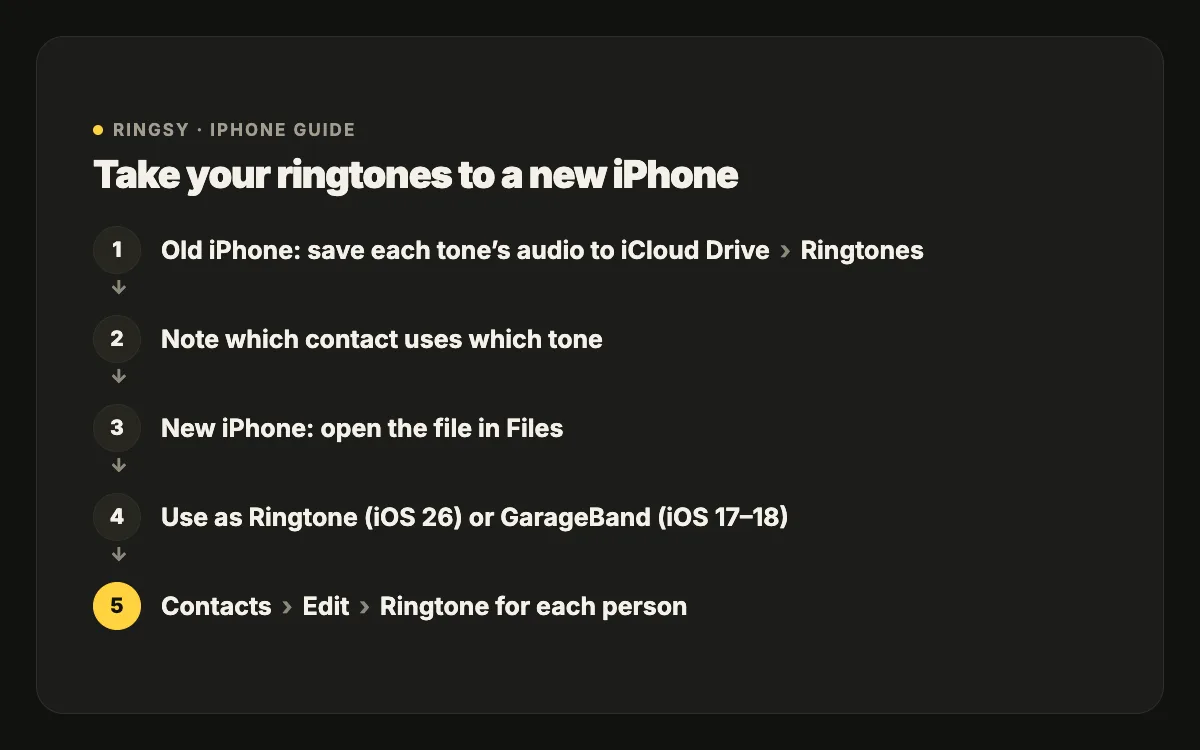
- 1In the Files app, open iCloud Drive and make a folder called Ringtones.
- 2For each custom tone, save its audio (under 30 seconds) there — the trimmed file, not the full song.
- 3In GarageBand, ringtone projects saved in iCloud Drive (the GarageBand for iOS folder) can be shared again as a ringtone on the new phone.
- 4Write down which tone belongs to which contact. iOS has no screen that lists every contact’s ringtone, so a quick note now saves guessing later.
On the new iPhone: add the tones back
- iOS 26: in Files › iCloud Drive › Ringtones, touch and hold a file, tap Share, then “Use as Ringtone”. Repeat for each tone.
- iOS 17–18: open each file in GarageBand and share it as a Ringtone, or connect to a Mac and drag .m4r files to the iPhone in Finder.
- Purchased tones: Settings › Sounds & Haptics › Ringtone › Download All Purchased Tones.
Then set your default ringtone and text tone again in Sounds & Haptics if they changed.
Put each person’s ringtone back
Open each contact on your list, tap Edit › Ringtone (and Text Tone if you used one) and pick their tone again. Check Emergency Bypass and Haptics on the same screen while you are there — custom vibrations, like tones, may need to be recreated.
Common problems after switching
- The tone is in the list but a contact rings with the default: their assignment didn’t come across. Set it again in Contacts › Edit › Ringtone.
- A tone appears twice: you restored it and added it again. Swipe left on one copy in Settings › Sounds & Haptics › Ringtone and tap Delete, then re-check contacts that used it.
- A tone is missing: re-add it from your iCloud Drive folder. If you didn’t keep the file, the only copy may be on the old phone — share it from there before you erase it.
Moving tones to someone else’s iPhone
Ringtones aren’t shared with family members automatically. To give someone your tone, AirDrop or message them the audio file; on their phone they open it in Files and add it with “Use as Ringtone” (iOS 26) or GarageBand (iOS 17–18). Only share sounds you have the right to share — your own recordings are fine, a copyrighted song is not yours to hand out.
Where Ringsy helps
Ringsy’s export screen has Save to Files, so each tone you make can go straight into an iCloud Drive folder — your backup, ready for the next phone. On the new iPhone, install Ringsy, tap Restore purchase in Settings if you bought Ringsy Unlimited (free on every iPhone with the same Apple Account), open the saved file from Files and set it again. Ringsy has no account and no server, so your tones live in your own iCloud Drive, not ours.